In the first 3 lessons lesson we covered:
- An introduction to the course and what is Office 365?
- Why should I use Office 365 and what to think about before rolling it out?
- Choosing an Office 365 plan
In this lesson, we’ll dive headfirst into Office 365 and walk through creating a tenant. We’ll cover this is three steps:
1. Choosing a name
1. Steps to sign up for a tenant
1. Logging into your new tenant
Choosing a name
This may seem like overkill to have a section to choosing a name, but this really is one of the most important parts of creating a new tenant. This is one of the few things in Office 365, that once it’s been set, there is no way to change it. No how, no way, it’s your name and you’re stuck with it. The ONLY way to change it is to stand up a new tenant and do a migration.
This name will also show up in several places with no way to change it. Don’t just randomly pick a complex name or a name that you don’t want to be stuck with. You don’t want users going to https://a7deib8a.sharepoint.com to access SharePoint.
When you do pick your name, here are a few of the places it will show up:
- Your default UPN/Username/email address (until/unless you set a custom domain). Your username will be username@[yourname].onmicrosoft.com.
- It will show up when you access SharePoint/OneDrive for Business. The URLs will be https://[yourname].sharepoint.com and https://[yourname]-my.sharepoint.com for SharePoint and OD4B relatively.
What if someone has the name I want to use? You’re plum out of luck. There is no way to get it. There is no way to submit a complaint or request to Microsoft to get it. Your only hope is to see who actually owns it. Maybe it’s one of your own employees that stood it up as a trial and you can just take it over. If not, your only hope is that whoever does have the name you want will delete their tenant. Even then, it can take up to 90 days for the name to be released after a tenant is deleted. So, my recommendation, if it’s a not a tenant you can take over, think of a new name.
Steps to sign up for a tenant
So, you’re ready to dip your toes into Office 365. It’s a pretty easy process to get started, in this next section, I’ll walk you through the process.
- In your browser, navigate to https://www.office365.com

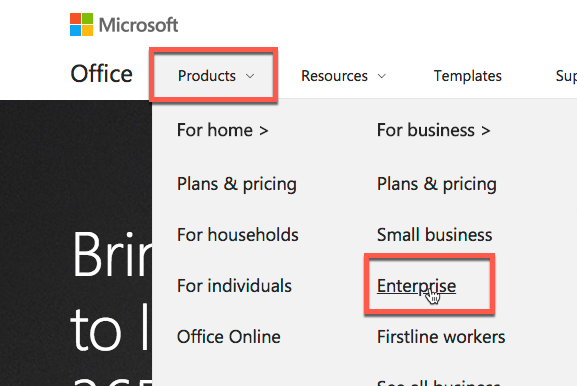
- Click on Products -> Enterprise. While you can choose to go the business route, I always recommend going with Enterprise. It gives you a lot more flexibility and will grow with you. While I’m a small business myself, I still go with an E5 due to the capabilities and flexibility it provides.

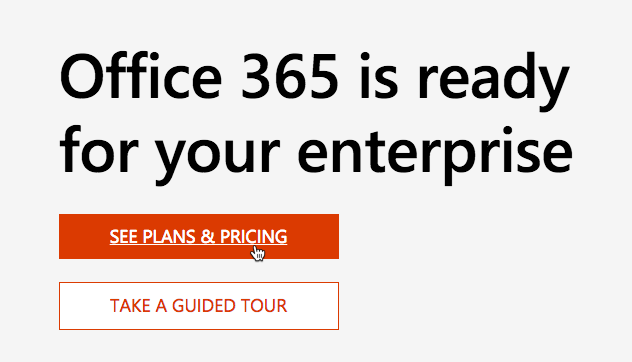
- From this page, you can look at what Office 365 is, watch a webcast series, take a tour, etc. We’re just going to assume you know you want to give Office 365 a try and get started with it, that is what we’re doing after all. Click on __SEE PLANS & PRICING__

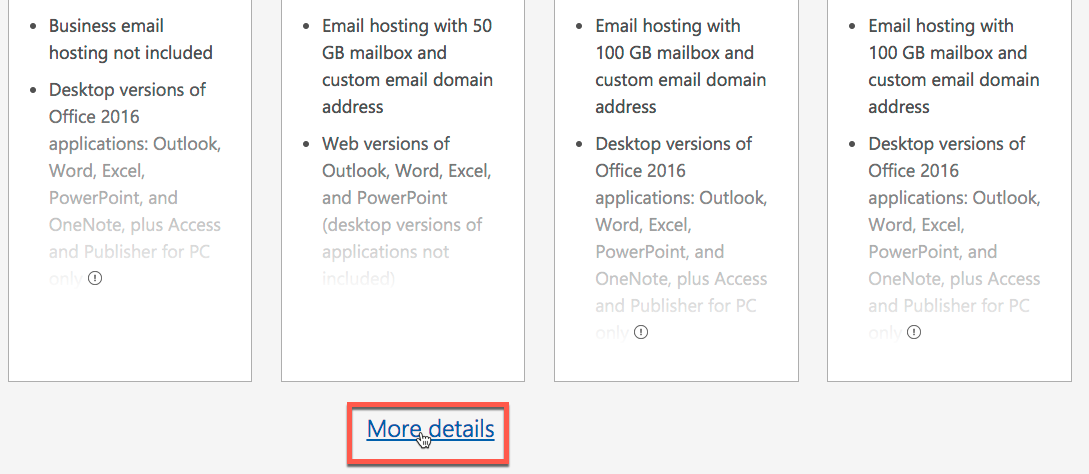
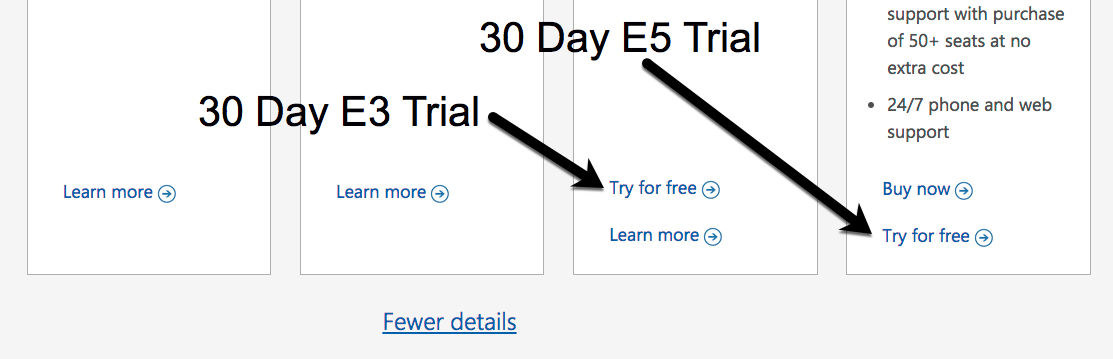
- If you’re ready to buy it, by all means, click on Buy now for the plan you want. Or, better yet, contact me and I can even get you a little discount…shhhh…keep it a secret…it’s just for you since you subscribe to this course (or are reading this eBook). But, if you just want to take Office 365 for a spin before committing, I completely understand! For a 30-day trial scroll alllll the way down the page and click on More details

- Because Microsoft hasn’t made you do enough scrolling and clicking yet, scroll alllll the way down AGAIN. Now you’ll finally see links for Try for free. This is for the E3 and the E5 plan. Personally, I just say start with E5, unless you don’t want to be tempted to purchase the E5, then just choose E3 so you aren’t tempted by all the goodies in the E5 plan. Anyways, just click the one you want to try.

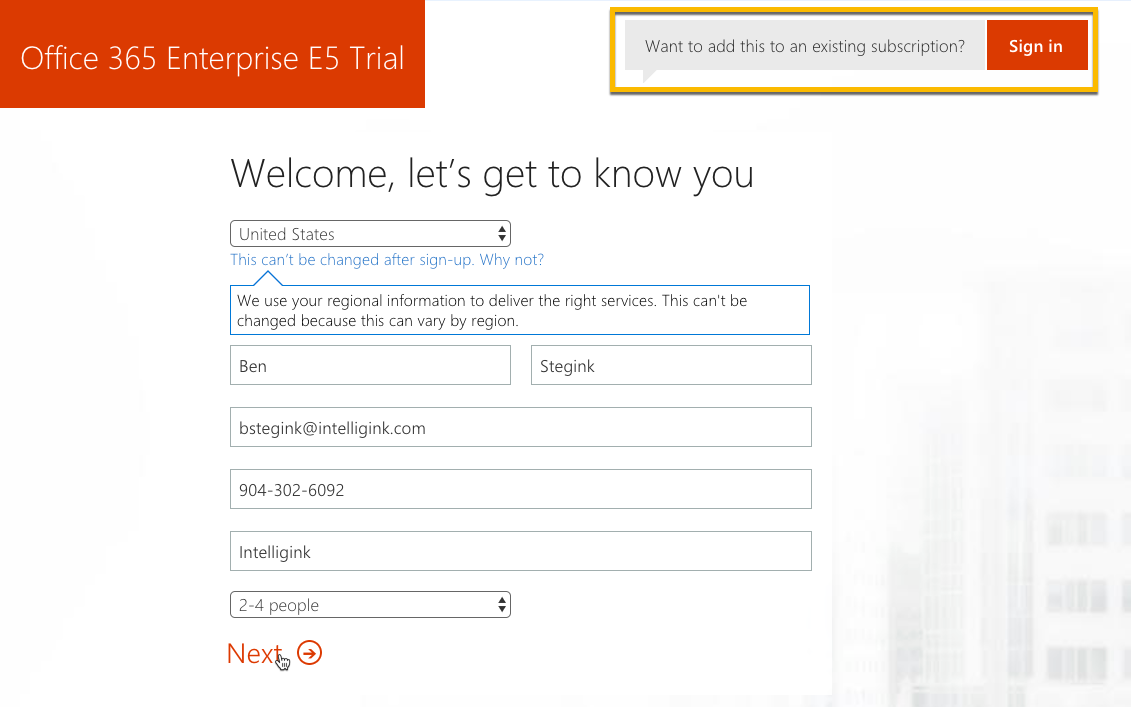
- Now the “fun” part, entering all your information. So really, it’s not too bad. You just need a country, first name, last name, email address, phone number (this one doesn’t have to be real), company name and organization size. Honestly, none of this really matters too much, it’s more so Microsoft knows who you are. Country and email are the only ones you really need to be valid. If this is going to turn into your production tenant, make sure you choose the right company. Due to various laws, regulations, etc, this determines quite a few settings for the various service in Office 365 and can not be changed later. You can also use the same email address over and over again for trials. I haven’t been rejected yet based on the fact that I used the email address in the past. By the way, if you want to get a hold of me, all the information in the screenshot below is my actual information. Once you’ve entered all your information, click next ->

(BONUS): You’ll notice I outlined a box in yellow in the upper right of the screenshot. If maybe you’re on an E3 plan already and want to trial and E5 plan, you can add this to your existing tenant/environment by clicking the Sign in button here. Then you’ll be signed into your existing tenant, and can add this 30-day trial there rather than using a brand new tenant for the trial.
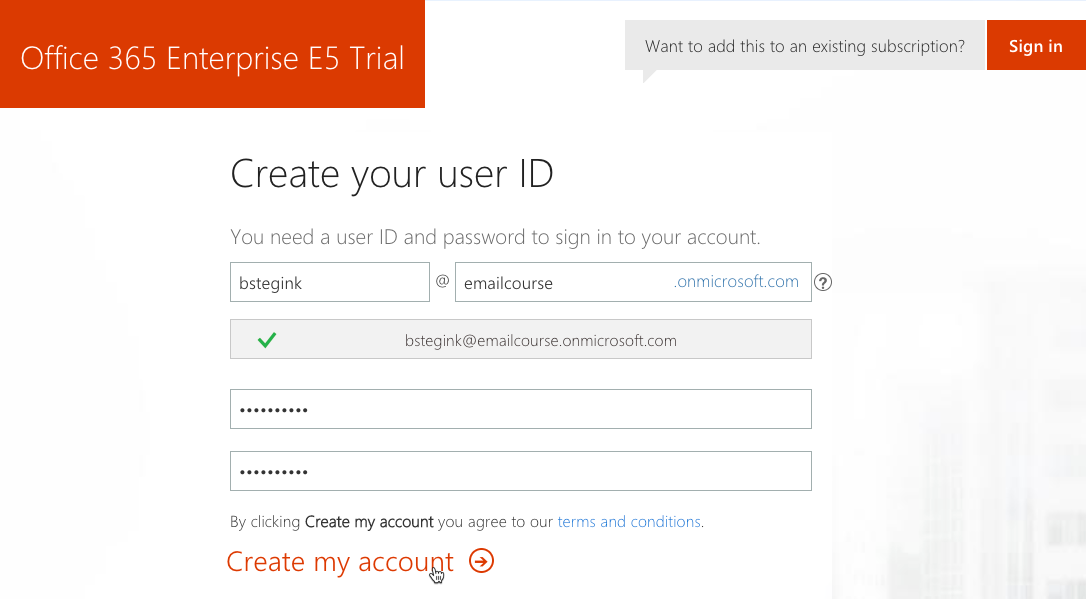
- THIS IS THE MOST IMPORTANT STEP IN THE WHOLE PROCESS. Choosing a tenant name (just like I mentioned earlier in this lesson). See the Yourcompany I’ve highlighted in the screenshot below? What you put here will be your tenant name FOREVER (at least as Office 365 is today). When you want to access SharePoint, you’ll go to https://Yourcompany.sharepoint.com, same things with OneDrive. You’ll also see this displayed other places in Office 365. Think about what you choose here. For two reasons actually…
- If this turns into your production environment, you don’t want it to be mytrialcompany.onmcirosoft.com for the rest of your life
- If you are going to spin up a production tenant later, you don’t want to use that name now, you won’t be able to just delete your trial and use the same name. If you choose mycompany.onmicrosoft.com now, it’s taken, you can’t transfer it to a new tenant. The only way to get it is to delete this tenant, wait 90 days, and then you should be able to get the tenant name
So, to reiterate, take care when choosing this name
The other fields are username and password, this will be what you use to login to your tenant you’re creating. So, you’ll log into your tenant using [email protected]. As you can see in my case, it is [email protected]. Make sure you remember this username and password! Once you have everything filled out, click Create my account ->

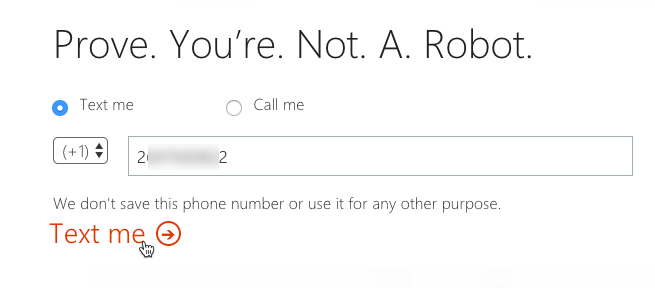
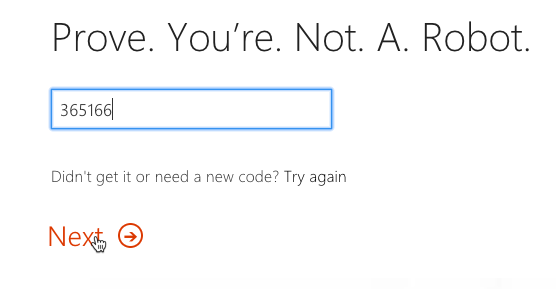
- Just kidding, we don’t get to create it yet. Now we have to prove you’re not a robot by providing a phone number. As you can see in the screenshot, it can be either a text or a phone call. If you have a google voice number or skype number you can try to use for the text, I have had some issues with it. You’re best off using your actual cell phone number if you want to get a text. Enter your phone number and click Text me -> or Call me ->

- Now just enter the verification code and click Next ->

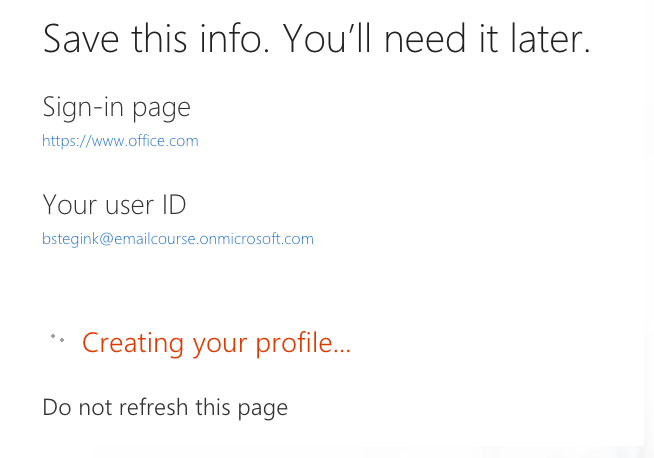
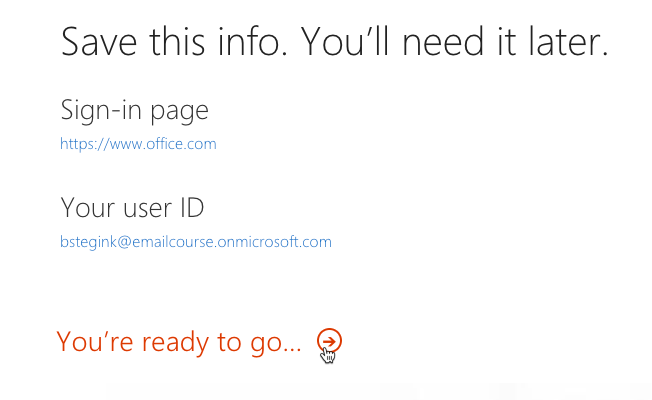
- Once you’ve entered the verification code, you’ll be taken to a “please wait” page while the basics of your Office tenant are created. Please, do what the page says and wait…do no refresh it. I promise once it’s done the site will let you know

- Once it’s done, you’ll see the text change to You’re ready to go… ->. At this point in time, make sure you take note of and remember your user ID. Then go and click the link!

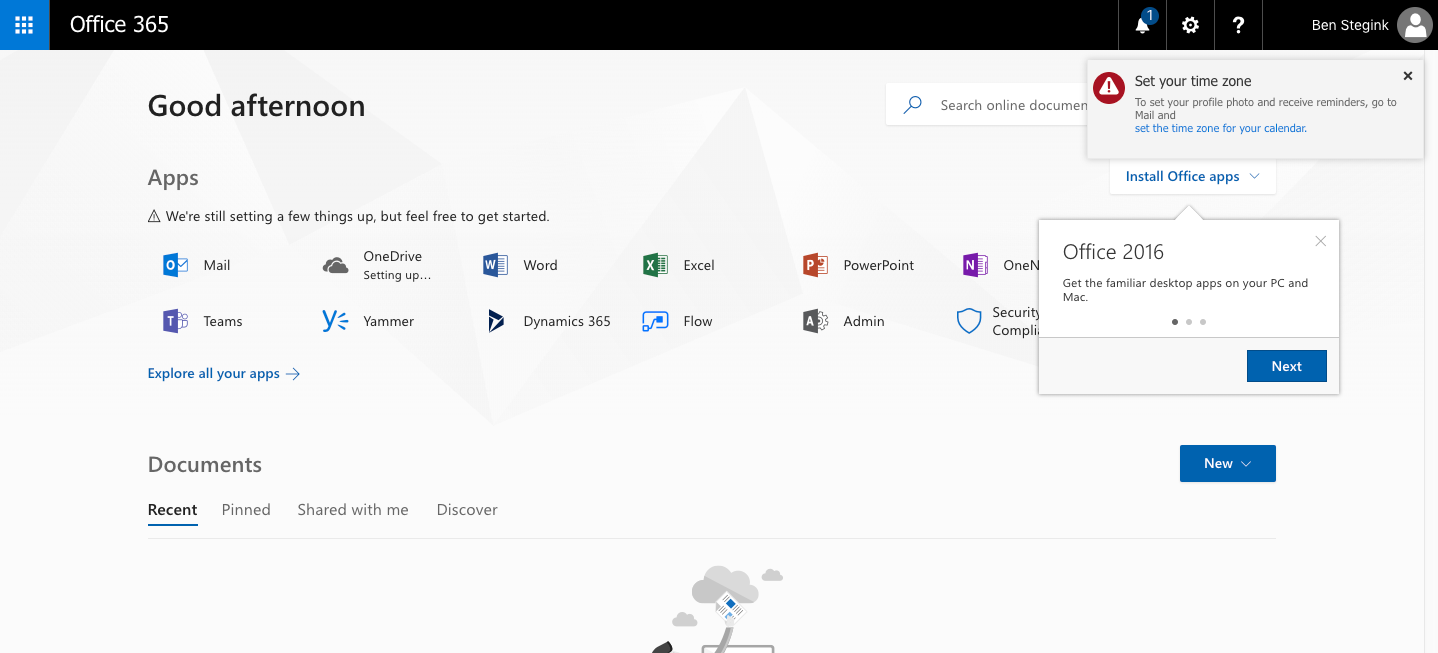
- Finally, you’ve made it! You’ll be automatically logged into your tenant and see your service start to appear. As we mentioned in step 10, just the basics were set up, you’ll see some of the services continue to be set up once on the page (like OneDrive in the screenshot). Just sit tight, they’ll all be ready to go soon. That’s all there is to it! You now have a 30 day trial of Office 365 to test out and play around with. You also have 25 licenses as a part of your trial so you can add an additional user to trial Office 365 with you.

So, now you have a tenant created, but you get logged out or your session expires, how do you get back to it? It’s actually really simple.
Logging into your new tenant
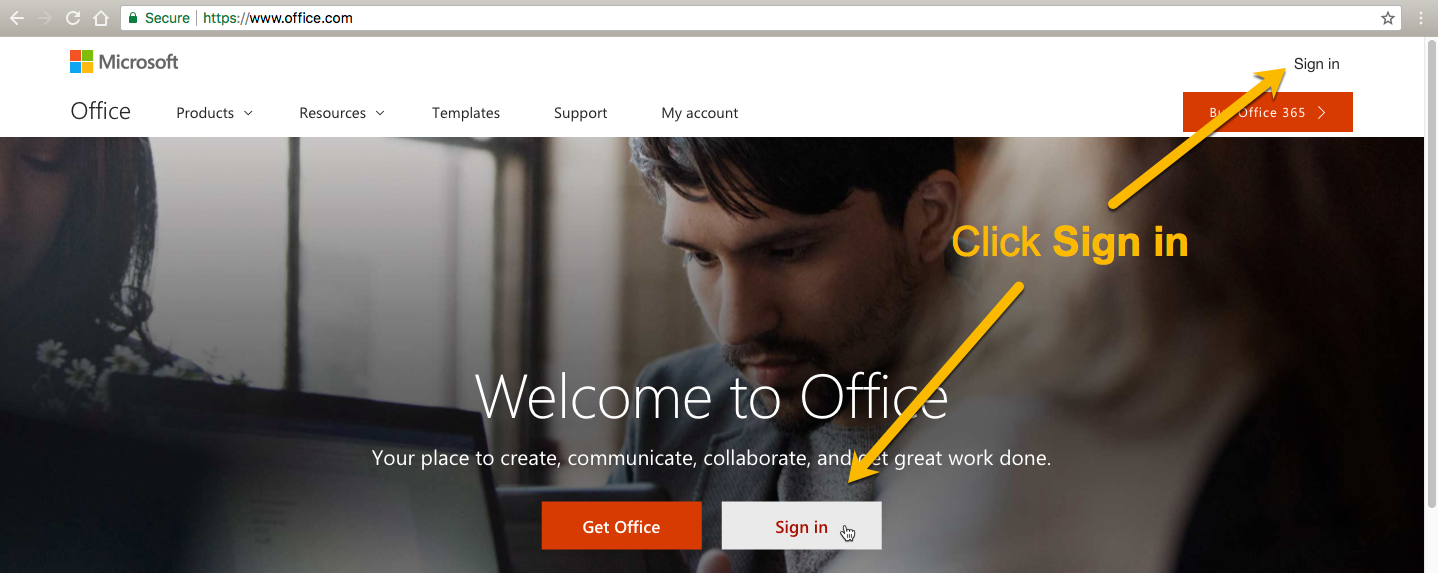
- Navigate to go to https://office.com.
- Click __Sign in__

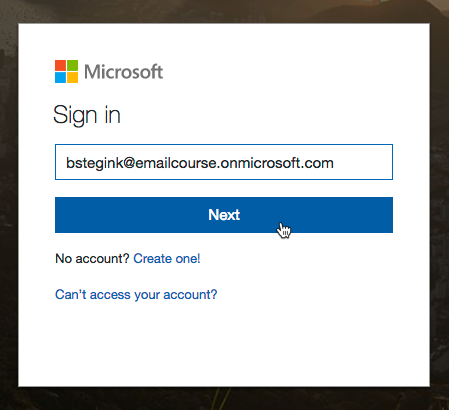
- Enter your username, click Next

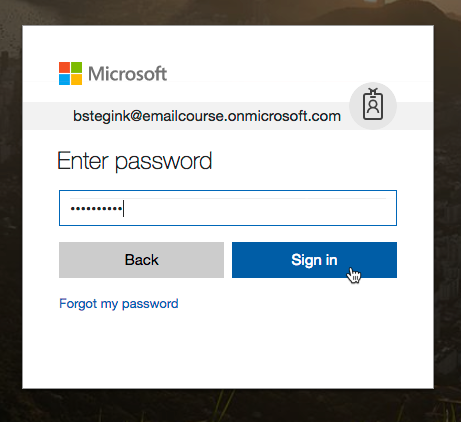
- Enter your password, click Sign in

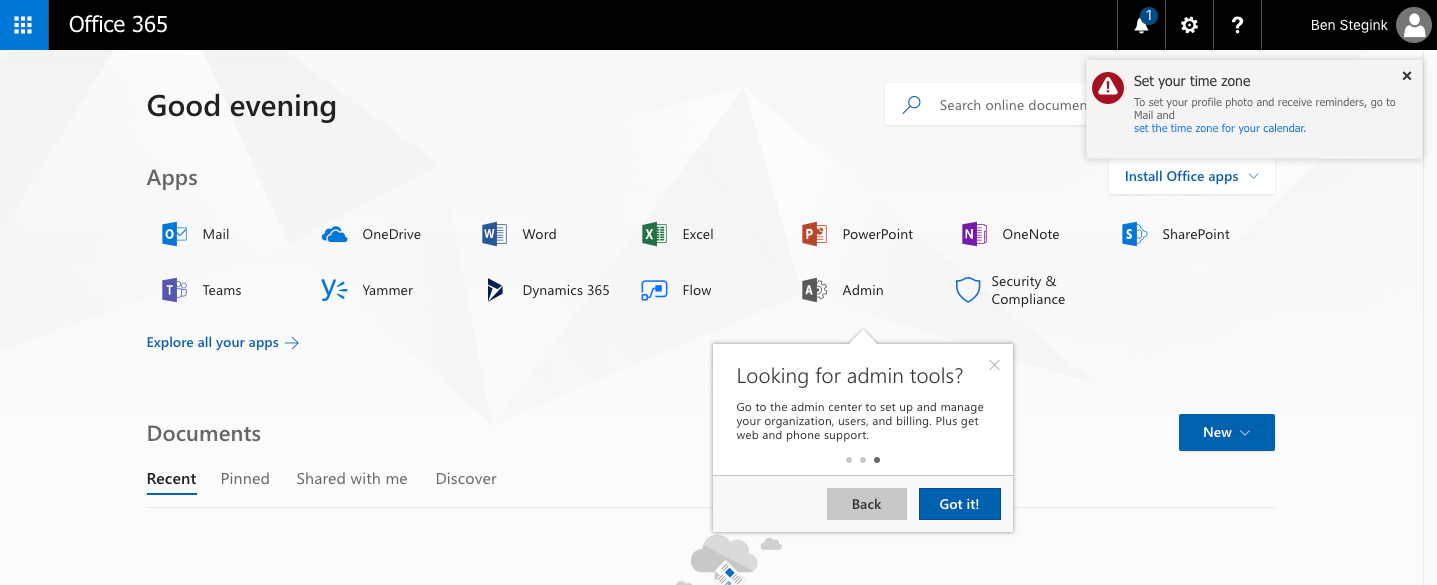
- And just like that, you’re signed in and ready to go!

Conclusion
That wraps up Lesson 4 on creating an Office 365 tenant. Tomorrow we’ll take a look at adding users to your tenant…just a heads up, this is something you want to put some thought into before getting too far into Office 365.